

How to Maintain Nasal Comfort During Oxygen Therapy
Table of Contents
- Why Oxygen Therapy Dries Out Your Nose
- What You'll Need for a Daily Comfort Routine
- Step 1: Tackle Dry Nose From Oxygen Therapy With Lubricating Gel
- Step 2: Use Saline Spray for Oxygen Therapy to Rehydrate
- Step 3: Add a Humidifier for Oxygen Therapy
- Nasal Cannula Comfort Tips That Make a Difference
- Common Mistakes That Worsen Nasal Irritation
- Conclusion
- Frequently Asked Questions
Last Updated: October 20, 2026
Why Oxygen Therapy Dries Out Your Nose
If you use supplemental oxygen, you already know the feeling: a raw, burning nose that makes every breath feel like work, which is why knowing how to maintain nasal comfort during oxygen therapy matters so much.
Oxygen therapy delivers dried, pressurized gas straight into your nasal passages. That constant flow strips moisture from the nasal mucosa, the thin lining that humidifies and filters every breath you take.
How Continuous Flow Affects Your Nasal Passages
Your nose is built to add moisture to air before it reaches your lungs. Continuous flow oxygen bypasses that natural process.
The result is mucosal dryness. The tissue cracks, scabs, and sometimes bleeds. Many people also start mouth breathing at night, which dries the throat and worsens the cycle.
Signs of Mucosal Dryness You Shouldn't Ignore
Watch for these early warnings:
- A dry, burning sensation inside the nose
- Crusting or scabbing around the nasal prongs
- Frequent nosebleeds, especially in winter
- Chapped lips and a dry mouth on waking
Catching these early matters. Left alone, irritation can make therapy so uncomfortable that people skip it, and skipped therapy means poor oxygen levels.
What You'll Need for a Daily Comfort Routine
A simple kit makes daily nasal care fast and easy. You don't need much, and most of it is inexpensive.
Here's what to keep within arm's reach of your concentrator:
- A lubricating nasal gel for moisture and a protective barrier
- A saline nasal spray for gentle rehydration
- A humidifier bottle that attaches to your oxygen source
- Soft ear cushions or tubing wraps for cannula comfort
Set these items up together and the routine takes under two minutes a day.


Step 1: Tackle Dry Nose From Oxygen Therapy With Lubricating Gel
Lubricating gel is the single most effective fix for a dry nose from oxygen therapy. A thin layer inside each nostril holds moisture in place and cushions the nasal prongs.
Apply a small amount with a clean cotton swab, morning and night. Reapply before bed, when dryness tends to peak.
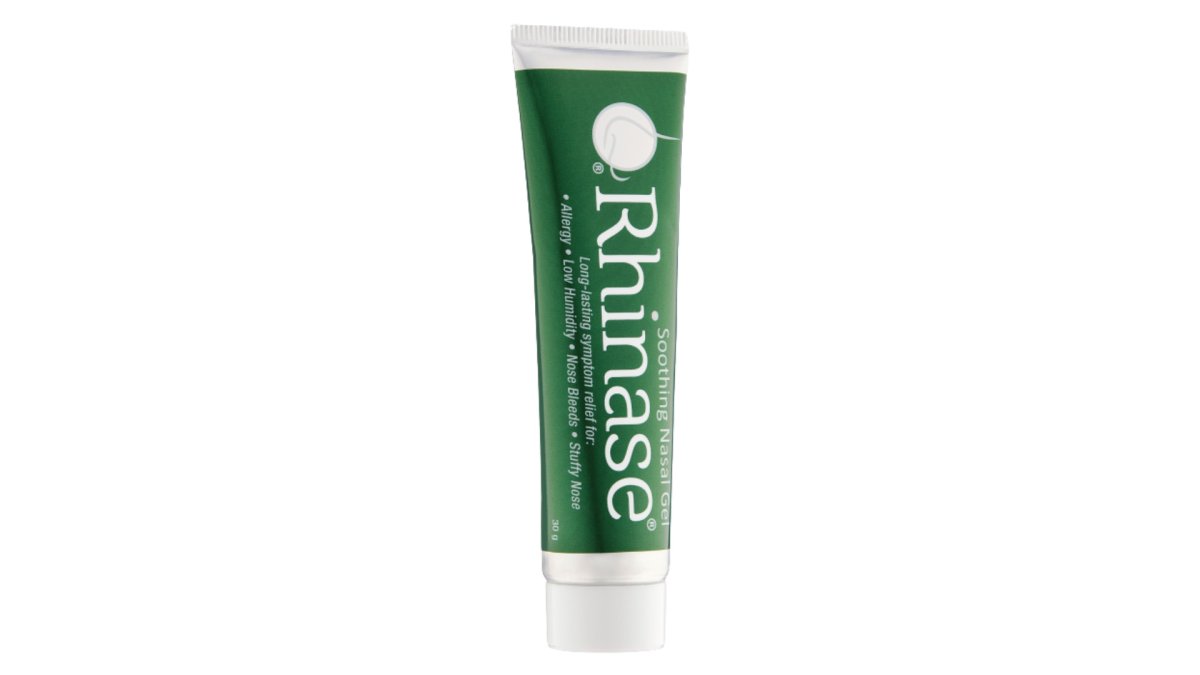
For oxygen and CPAP users, we recommend Rhinase Dry Nose Relief Lubricating Nasal Gel.
Why Petroleum-Based Products Are Dangerous Around Oxygen
This is the warning most guides bury, and it deserves to be at the top.
Petroleum jelly and oil-based ointments are flammable. Oxygen makes any fire spread faster and burn hotter. A petroleum product near an oxygen source is a real ignition risk.
The fix is simple: choose a petroleum-free gel. Check labels carefully. If you can't confirm a product is petroleum-free, don't use it near your oxygen equipment.
Step 2: Use Saline Spray for Oxygen Therapy to Rehydrate
Saline spray is the quickest way to rehydrate a dry nose during oxygen therapy. It loosens crusts, clears irritants, and adds moisture without medication.
Use it before you apply gel. A couple of sprays in each nostril, then gently blow your nose. The gel then seals in the moisture you just added.
A saline spray for oxygen therapy should be gentle enough for several daily uses.
Step 3: Add a Humidifier for Oxygen Therapy
A humidifier for oxygen therapy solves the problem at the source. Instead of coating dry tissue after the fact, it adds moisture to the oxygen before it ever reaches your nose, so the air arrives warmer and wetter. For anyone running continuous flow at higher liter flows, this is the single biggest comfort upgrade available.
How a Humidifier Bottle Actually Works
A humidifier bottle is a small, clear plastic canister that snaps onto the oxygen outlet on your concentrator or regulator. Oxygen bubbles up through distilled water inside the bottle, picks up water vapor, and travels down the tubing to your cannula.
Most home concentrators accept a standard threaded humidifier bottle. If yours does not, your equipment supplier can provide an adapter.
When You Actually Need One
A humidifier is not mandatory for every oxygen user. A common pattern among respiratory therapists is to recommend one when:
- Your flow rate is above roughly 2 liters per minute on a continuous-flow system
- You wake with a dry mouth, cracked lips, or a scabbed nose despite using gel
- You live in a low-humidity climate or run central heat through the winter
- You use oxygen overnight, when mouth breathing and dry room air compound the problem
If you use a portable oxygen concentrator on pulse-dose mode during the day, a humidifier bottle usually is not compatible, pulse-dose portable units are designed to run dry. Save the bottle for your home stationary concentrator.
The Daily Humidifier Routine
Here is the routine that works:
- Fill the bottle with distilled water each morning, never tap water, which leaves mineral scale that can clog the bottle and irritate your airway
- Check that the bottle threads snugly onto the outlet and the tubing connects without a gap
- Keep the water level between the fill lines; overfilling causes gurgling and water slugs in the tubing
- Empty and air-dry the bottle every night so bacteria and mold do not colonize standing water
Troubleshooting Common Humidifier Problems
- Gurgling or water in the tubing: the bottle is overfilled or the concentrator sits higher than your cannula. Lower the water level and route tubing so condensation drains back toward the bottle, not into your nose.
- Whistling at the connection: the bottle is cross-threaded or the gasket is worn. Reseat it; replace the bottle if the seal is damaged.
- No moisture despite a full bottle: check that the oxygen is actually bubbling through the water. A blocked diffuser or a bottle threaded onto the wrong port will pass dry gas.
- White crust inside the bottle: mineral scale from tap water. Switch to distilled water and replace the bottle.
Nasal Cannula Comfort Tips That Make a Difference
Small adjustments to your cannula prevent most skin irritation. The goal is less friction, less pressure, and better fit, and the fixes are cheap, safe, and reversible. This is the section most guides rush through, so here is the practical version.
Fit and Pressure Fixes
- Use ear cushions. Small foam or fabric pads slide over the tubing where it crosses the tops of your ears. They stop the line from digging in and are the fastest fix for sore ears.
- Add tubing wraps. A soft fabric wrap around the cannula behind your ears and along your cheeks reduces drag and chafing, especially if you turn in your sleep.
- Check the fit at the prongs. Nasal prongs should sit gently at the nostril opening, not press hard against the septum. If you feel pressure on the center wall of your nose, the cannula is too tight or the prongs are the wrong size.
- Rotate pressure points. Shift the tubing path slightly each day, over the ear one day, secured to a collar the next, so the same spot is not rubbed continuously.
Safe DIY Tubing Routing
You do not need special equipment to reduce ear pressure. A few medically safe modifications make a real difference:
- Route the tubing behind your chair or headboard rather than letting it hang from your ears. A simple clip or hook takes the weight off.
- Use a lanyard or soft headband to carry the tubing's weight across the back of your head instead of the ear tops.
- Loop the excess tubing and secure it with a soft tie so it does not snag on furniture and yank the prongs.
- Keep the cannula loose enough to slide a finger under the tubing at the cheek, snug, not tight.
Avoid taping tubing directly to skin with harsh adhesives, and never pinch or kink the tubing to reduce flow; that stresses the material and can crack it.
Cannula Replacement Schedules and Hygiene
Most suppliers recommend replacing a nasal cannula on a regular schedule, often every two to four weeks, and sooner if you notice stiffness, cloudiness, cracking, or a persistent odor.
Clean the prongs daily with mild, fragrance-free soap and warm water, rinse thoroughly, and let them air dry fully before your next session. Never share a cannula. Replace it immediately if it is cracked, discolored, or has been dropped in a way that could have contaminated the prongs.
Common Mistakes That Worsen Nasal Irritation
The biggest mistake is treating dryness with the wrong product. Oil-based ointments feel soothing, but they're a fire risk near oxygen and can damage some tubing materials.
Other frequent errors:
- Skipping the humidifier because it feels like extra hassle
- Over-tightening the cannula to stop it slipping, which causes pressure sores
- Using tap water in the humidifier bottle, which leaves mineral buildup
- Ignoring early irritation until the nose is raw and bleeding
- Using steroid sprays without medical advice to control congestion
A common mistake is waiting for symptoms to get bad. Daily prevention takes less effort than fixing damaged tissue.
If irritation persists despite good habits, see your doctor. A chronic respiratory condition like COPD can make nasal tissue more fragile, and your care team may adjust your setup.
Conclusion
Dry, irritated nasal passages are the most common reason people struggle with oxygen therapy. The fix is a short daily routine: a petroleum-free lubricating gel, a saline spray, a humidifier bottle, and a well-fitted cannula.
Oxygen therapy shouldn't cost you your comfort. Our Rhinase gel uses dual salts and dual wetting agents to lock in moisture, and the Rhinase X Combo Pack pairs a gel for the lower passages with a spray for the upper sinuses.

Frequently Asked Questions
How can I keep my nose from getting dry while using oxygen?
Use a water-based lubricating nasal gel inside your nostrils two to three times a day, and run a humidifier if your flow rate is above 2 liters per minute. Drink plenty of water, avoid caffeine and alcohol before bed, and keep the cannula prongs clean. A saline spray can also rehydrate nasal passages between gel applications. If dryness persists despite these steps, ask your healthcare provider about adjusting your oxygen flow or adding a heated humidifier.
Can I use saline spray while on oxygen therapy?
Yes. A saline spray for oxygen therapy is safe and helps loosen crusts and rehydrate the nasal mucosa. Use it before applying a lubricating gel so the gel holds moisture in. Choose a preservative-free saline product if you use it more than three times daily, and avoid medicated sprays unless your doctor approves them. Saline also helps clear blood-tinged mucus that can form when passages dry out.
What can I put inside my nose for dryness from oxygen?
A water-based, petroleum-free lubricating gel is the safest choice. Look for products with dual salts and no aloe, dyes, or fragrances. Rhinase Dry Nose Relief Lubricating Nasal Gel, $23.85 for 60 g, is doctor-recommended and safe for oxygen therapy users, with a pH of 6.2 that avoids stinging. Never use petroleum jelly, mineral oil, or oil-based balms inside the nose while using oxygen because they are flammable and can damage nasal tissue.
When should I ask my healthcare provider about a humidifier for oxygen?
Ask about a humidifier if you use oxygen at a flow rate of 2 liters per minute or higher, or if you wake up with a dry, sore nose, nosebleeds, or mouth breathing. A humidifier for oxygen therapy adds moisture to the gas stream and can reduce mucosal dryness. Your provider can also check whether your flow rate, cannula fit, or delivery method is contributing to the irritation.